
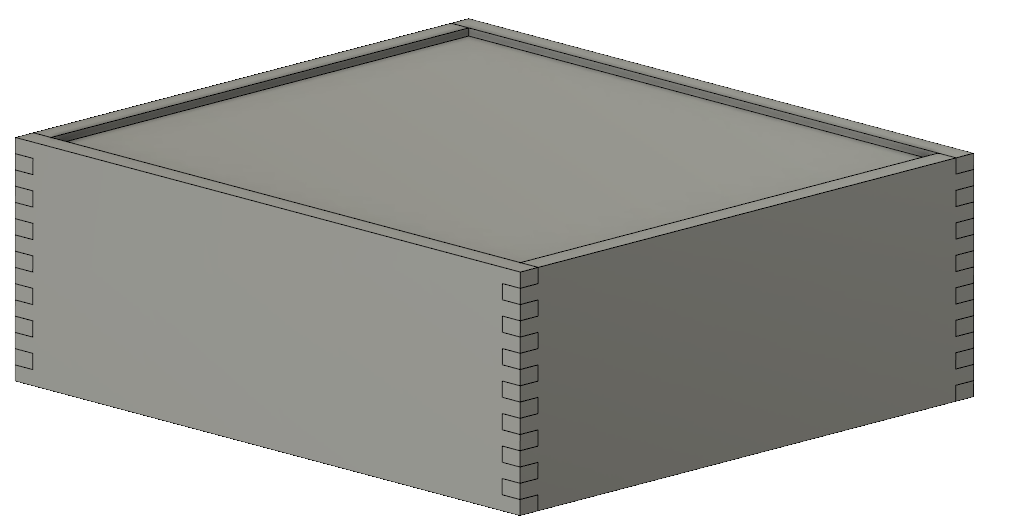
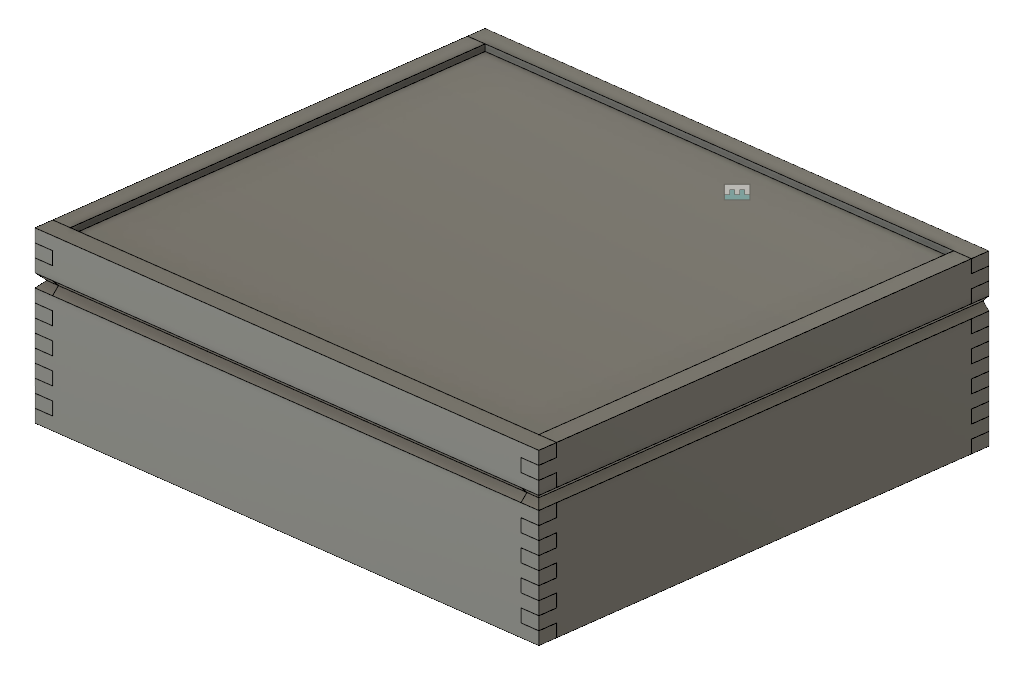
A close friend of mine asked me if, instead of buying them anything for Christmas, I would consider making he and his wife a tea box. I had only ever made one thing similar to this, but thought it was a nice idea. 80 working hours later, this was the result:

For more images, see the full gallery on my SmugMug account.
This was the first major woodworking project that I did the design work using Autodesk Fusion 360 (free, enthusiast license). This was also the first box I made with a hinged lid, which was a new design experience for me. I had recently acquired an Incra iBox box-joint jig and wanted to use that as well. Finally, I knew I wanted to have mountain looking scene on the box. This sort of design had been floating around the internet recently and I liked it for this box because it would fit nicely with our collective connection to Montana.
Materials
I bought some nice figured cherry from the lumber yard for the bulk of the box. After getting the initial cuts made, I liked the wood so much at the price, I bought a few more boards to sit in reserve. For the slats, I had some left-over cherry from other projects. Given that they would not be seen (inside and covered by tea bags), I didn’t use anything fancy here.
For the box lid and bottom, I bought a small piece of 1⁄4 cherry laminated plywood. Previously, I had made a lid from butt-jointed maple, which was very pretty, but the thermal expansion and contraction of panel made it impractical for actual use. I figured that a nice panel of plywood would avoid this issue and help keep lid straight on the hinge. Given that I was going to put a design on the top, I also wanted no issue with warping.
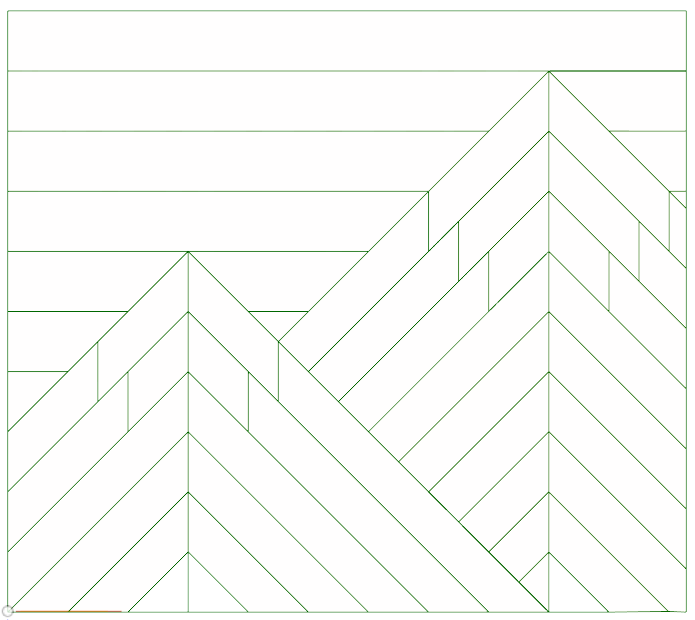
For mountain design, some of the scrap cherry had a wonderful cloud looking knot patter, so I decided to use that for a ‘sky’ look. The mountains are black walnut strips (from scrap) and the snow is from some white ash that I picked out of the scrap bin at the shop. (I only know it is white elm because it was written on the scrap itself!)
Design
I started by looking online for a few different tea box designs to find a rough sketch of what I wanted. I also measured a few tea bags I had (including wrappers) to get an idea of how many slats and what aspect ratio they needed to be. After letting the idea gel a little bit, I started designing the box in Fusion 360. I am not an expert CAD user, so the terminology and tools took a little while to get used to. I had mocked some other projects in the past, but I wanted to try to make very detailed designs for this one.
I started by sizing the box and getting the finger joints to cut and align on all of the sides. The iBox allows a fairly wide range of widths, but I wanted narrower fingers, so I went with 1⁄4 in fingers. I was very careful in laying out and counting the fingers because:
- I was going to set the plywood lid in the sides using stopped dados, so I needed some clearance on the top and bottom;
- I wanted the lid to hinge through the fingers on the side panel;
- and I needed the base to be deep enough for the tea bags (lid too).
For the lid to line up so that I could achieve the second goal, I needed an extra pair of fingers in the original box, which would be cut out. (In fact, with this strategy, one entire finger would be cut out due to losing 1⁄8 in for the kerf of the table saw blade, twice.)
After lining up the 4 sides and creating the top and bottom panels, I used the panels to cut the lid/base dados into the sides.
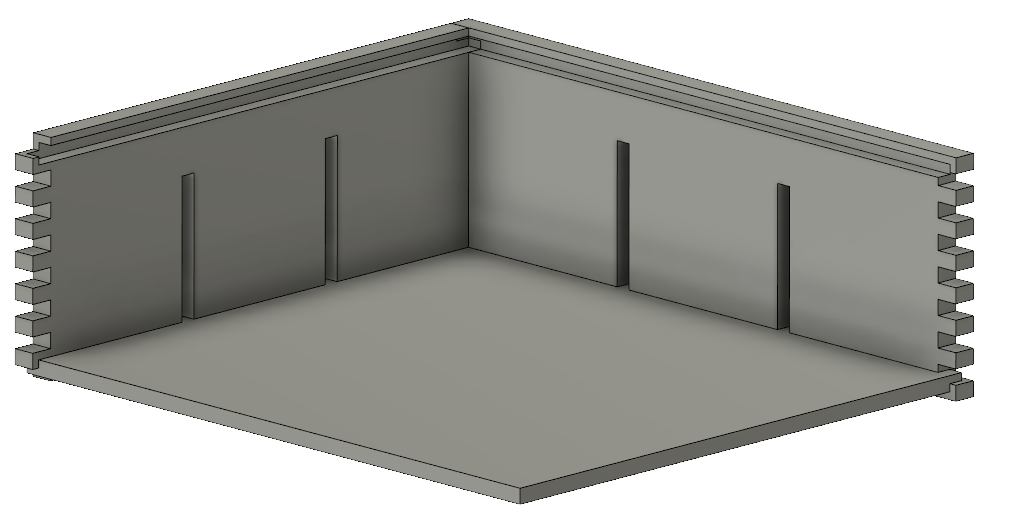
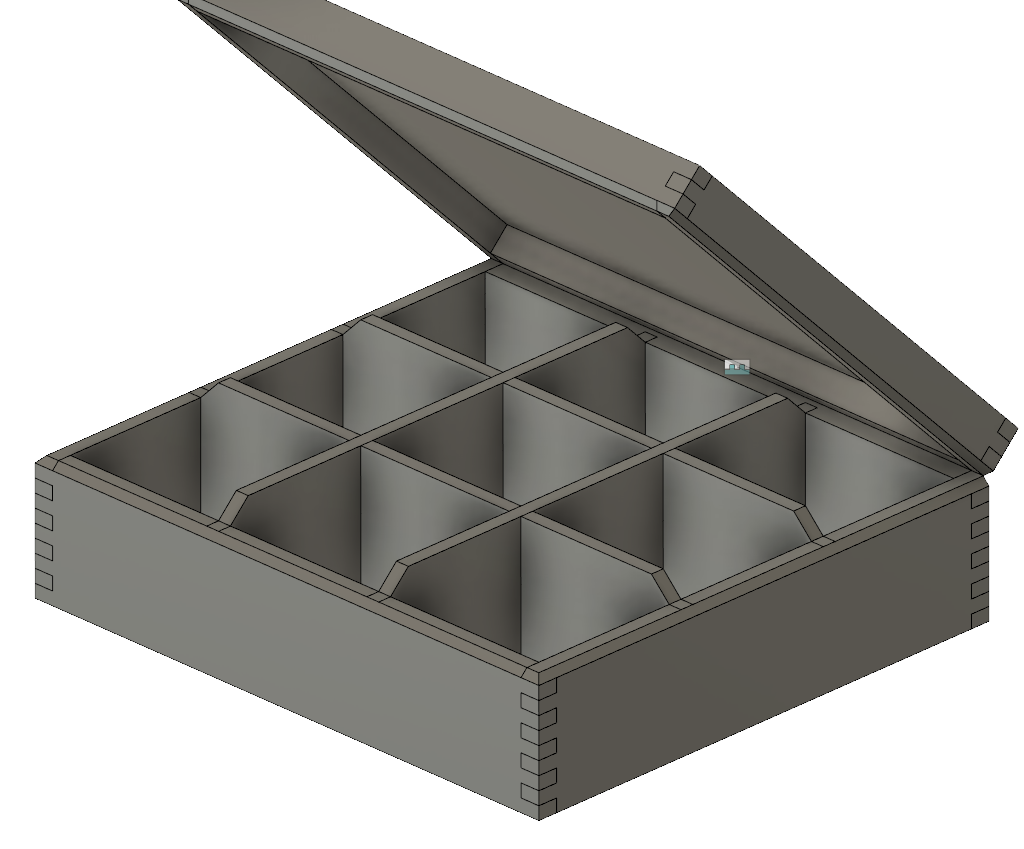
To create the tea slots, I also used panels to create stopped dados on the sides.
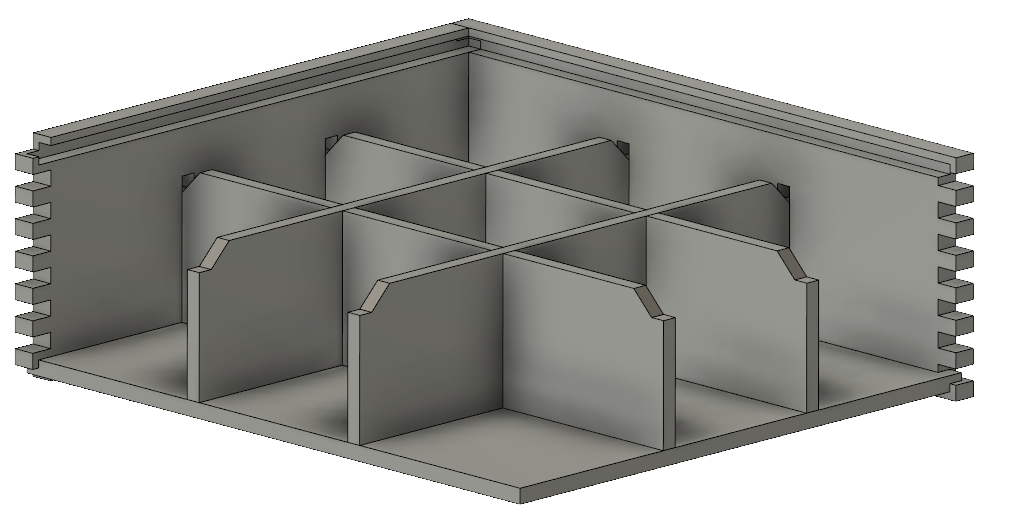
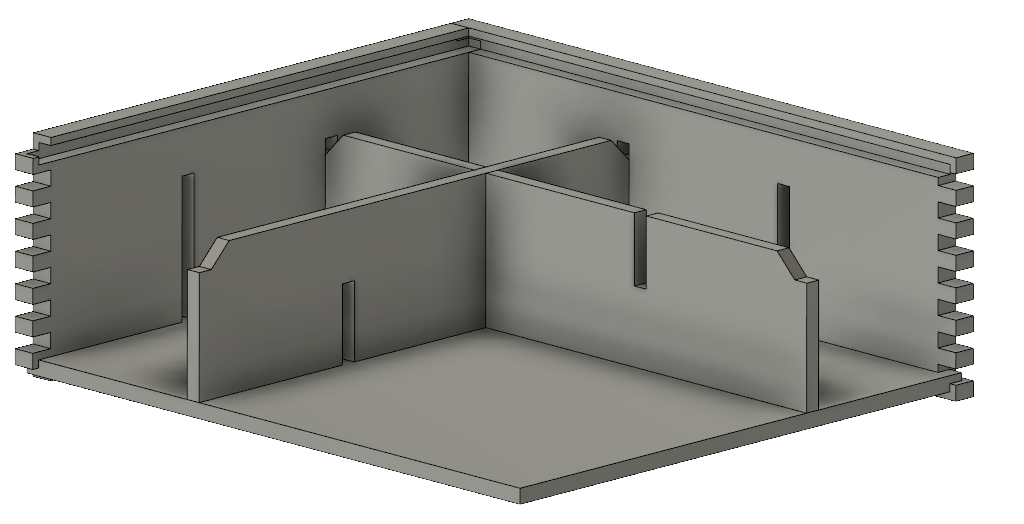
I also removed the material necessary to make the dividers inset with each other. (Ignore the mitres on the top of the slats, I did not end up cutting these. I ended up cutting the dividers flush to the box top.)
I also used Fusion 360 to mock up the hinge layout. I used the construction tool to cut out the layer of fingers I was not going to keep and added bevels to the sides (this detail did not make it to the final product).
I added the hinge so I could see how it would look with the lid open. This was not really necessary, but I was just playing around with the tool.
Finally, I tried to use Fusion 360 to do the mountain design work, but ultimately I was not successful. The locations and sizes needed to be too precise for what I could do with my laptop inputs and a 3D tool, so I created the design in Inkscape. I was not able to import the design and create parts in Fusion 360 (this is my failing, not the tool), but I was able to import the design to get decent measurements for the various cuts.
STEP files for the uncut box, the cut box, and the box lid are available.
Construction
To create my cut list, I used the measurement tool in Fusion 360 to get precise lengths and I printed (on paper) each part so that I could annotate the dimensions. This is probably not the best way to do it, but it was what I could do at the time.
Unfortunately, I did not take pictures during construction, but here is a rough description of the steps, tools, and techniques I used to make the box.
The box itself:
- Mill the four sides and cut down the plywood to the required dimensions. I carefully selected which boards would fit best to keep the grain flowing around the box and to feature a nice knot in the front.
- Cut the stopped dados. I did this on a router table with a 1⁄4 in spiral upcut bit. For each side, I cut the dados for the lid and bottom 1⁄8 inch from the top and bottom. This means that the dados are half way through some fingers. I stopped the dados 1⁄8 in from the end of the fingers and cut the dados 1⁄4 in deep. This made the dado slightly deeper, in all dimensions, in case there was any expansion or contraction.
- Cut more stopped dados. I used a similar technique to cut stopped dados for the dividers. For these, I was careful to end them in the dado on the bottom, and in the section of fingers that would be removed on the top.
- Use the iBox on a table saw with a 1⁄4 in dado stack I cut the finger joints. The iBox works wonders when it is set up correctly, but dialing it in can take a little while and takes me a lot of scrap to fine tune.
- I milled and cut the dividers to size.
- At this point, I dry-fit the box, made minor adjustments, and glued it up.
The lid design:
- I used a jig (which I can’t recall the name of right now, I think it was from Rockler) to cut 1⁄4 thin strips of the walnut, cherry, and ash.
- Using my mitre jig and a lot of careful measuring, I cut the angled pieces for the mountains and snow and dry fit them to the box. This required a decent bit of custom sanding and shaping to get the fit as close as possible.
- I filled in the gaps with the cherry scrap, also cut unto strips.
- Using painters tape, I taped the mountain sections together, and eventually glued them to each other one piece at a time. In the future, I would probably glue these directly to the box lid, but I was not confident in the fit and ended up needing to remake a few anyway.
Completion:
- Sanding. Lots of sanding.
- Using a crosscut sled and the dado stack, I cut the slots for joining the dividers.
- I used a table saw to cut the box top from the bottom. I did this by setting the table saw blade height to just under the thickness of the box walls and making two cuts in the removal area. This was not enough to remove the top entirely, but it was enough to prevent any cut from binding on the saw blade, kicking back and ruining the box. I then used an exacto knife to remove the remaining waste and separate the lid and box bottom.
- Next, the dividers were glued in. I was careful to glue in a way that any movement in the dividers would not explode the box.
- To cut the hinge dados, I followed a youtube video and used a cross-cut sled with a very low blade height to cut the boundaries of the dados. I used a chisel to remove the rest of the material and after pre-drilling some screw holes, I screwed the hinges in.
- I removed the hinges and used a simple neutral Danish oil to finish the final product.
- After replacing the hinges, the box was complete.
Final Results
I’m incredibly proud of this piece and am even more proud to have given it to some well deserving friends.


Design Gallery
-rjh